How to Migrate Google Apps (G Suite) to Office 365 Manually
Migration from one email platform to another application is so common nowadays. Some users are switching from the paid email client to free application like Outlook to Thunderbird and vice-versa. Amongst all, the query of G Suite to Office 365 migration attracts half of the businesses.
Many organizations are switching their complete business collaborative application from G Suite to O365 online. So, whenever an email client switch occurs, there is a requirement of a technique that can export its old data into a new application. Therefore, in this article, we are going to show you a complete guide that can move data of G Suite to MS Office 365 mailboxes.
Technique to Perform Data Migration from G Suite to Office 365
This workaround named as IMAP Migration and it is considered as a better manual method over other traditional approaches. But, this solution only imports messages of Gmail in Microsoft Office 365 OWA. Here, the complete method using IMAP Migration is described below.
Step by Step Migration from Google Apps to Office 365
There are two possible ways through which IMAP Migration can be done, i.e. Exchange Admin Center (EAC) and PowerShell. The PowerShell command is very much complex and requires attention while using it. Thus, we opt EAC approach to import Gmail email into O365 webmail. Just go through the below instructions and complete the task successfully.
Step 1: List All the Mailboxes
The very first step is to make a list of mailboxes in G Suite domain that are going to be imported. For this, execute the following steps.
Note: The list size must be of 10 MB.
- In Google Admin Console, sign in with admin account.
- Once the account validates successfully, click on Users as shown in the screenshot.

- Now, you can see a user ID along with last login detail. After that, note down all the email ID.

- Once you write down the users email addresses, log in to O365 admin center.
- Select Users >> Active users. Then, navigate to USER NAME column present in between to DISPLAY NAME and STATUS. You need this detail later in the process.

- After that, start Excel application and make a table as shown in the screenshot. You need to create three columns that are Email Address, UserName, and Password. In Email Address Column, write all the user ID associated with O365. Next, type the log in name of user and password in UserName and Password column respectively.

- Once you complete the excel sheet, save in CSV format.
Step #2: Connect Gmail Account With O365
It is mandatory to make a connection between the O365 and Google Apps account to transfer emails. The following instructions need to be performed in order to establish a network.
- Go to Exchange Admin Center.
- Navigate to Recipients option and select Migration.
- You need to select Migration endpoints by clicking on More option.

- Next, move the cursor to New icon. It is used to generate new migration endpoint.
- After that, you need to select IMAP from the next page.
- The IMAP migration configuration page pops-up on the browser. Just mention imap.gmail.com in the IMAP Server setting option.
Tip: Ensure that rest of the default settings stay same.
- Hit the Next button and create a connection between Gmail & MS O365 account.
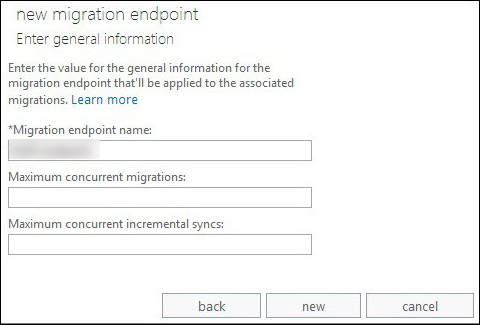
- Once both account connected properly, Enter general information dialog box pops-up.
- Just type a suitable name for the migration endpoint and leave the next two consecutive boxes. Then, click new button.

Step #3: Need to Make Migration Batch
This step is very useful when there is a requirement to move multiple G Suite mailboxes to Office 365 at the same time. To do this, use the below steps.
- Open Exchange Admin centers with the help of browser.
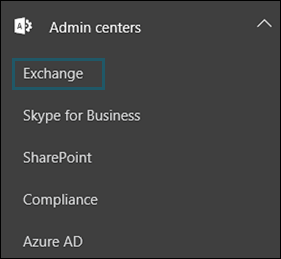
- Once it is opened, select Exchange from the left-side pane.

- After that, select Recipients and click on Migration option.
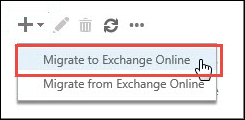
- Next, click on ‘+’ drop-down button and choose Migrate to Exchange Online.

- Select IMAP migration >> Next.
- On the following page, click on Browse button and upload migration file.
- Next, O365 will verify the file on different factors such as the file must be of CSV type, Rows should be equal to 50,000 or less and much more. If the file does not follow any of the parameters, then an error message will generate. Else, all the Gmail mailboxes will appear on the screen.
- Click on Next button.
- In Set the migration endpoint section, you need to pick that migration endpoint that was created earlier.
- Choose the default values from the IMAP migration configuration page and click Next.
- This is the most interesting part when you have to provide a relevant name for the migration batch. If you wish to eliminate few folders from export task, then just type the name of folder in Exclude Folder box. Then, click on Next.
- In Start the batch page, execute each and every instruction sequentially.
- Select Browse button to share the export reports to sub-users. Alternatively, user can go to the Properties option and view the complete file.
- You need to choose Automatically start the batch and hit the New button to initiate the G Suite email to Office 365 migration process.
How to Migrate G Suite Contacts / Calendars to Office 365 Account?
The manual workaround is only devoted to import Gmail emails in O365. However, contacts and calendars also play a significant role and need to migrate. Although, there is no manual method available that can directly migrate Google Calendar to Office 365 along with emails, contacts and the other data, in bulk. So, users can go with the automated solution named as G Suite to Office 365 Migrator.
This utility can smoothly transfer Google Apps emails, calendar, and contacts in MS O365 mailbox in a matter of minutes without any error. Users do not require to follow a long sequence of step in software. It only needed few mouse clicks and rest of the migration process done automatically. Furthermore, the filter option of the tool helps the user a lot in case of selective data migration. If users do not want to take headache of G Suite to Office 365 migration, then use this tool and makes it simple and facile.